| Time Required: | Difficulty: |
Tools Required
- Tape measure

- 6 ft level

- 2 ft (or smaller) level

- Framing square

- String or twine

- Several tubes of elastomeric or polyurethane sealant

- Caulking gun
- Step ladder

- Small pry bar

- Hammer

- Safety glasses

- Utility knife

- Gloves

- Hammer tacker or staple gun

- Nail gun

- Screw gun

- A Phillips and flat-head screwdriver

- Putty knife

Materials Required
- Wood shims
- Small piece of fiberglass insulation
- Brickmould or exterior trim ( if not included with the unit)
NOTE: Use #8 2.5 or 3 inch screws. Use exterior grade screws to prevent rusting.
NOTE 2: A Therma-Tru sill-pan kit and flexible flashing product can help ensure the opening is water-tight. This may also be required by building codes in some areas.
Steps to complete
5) Shim jamb at hinge locations
6) Adjust and fasten lockside frame
7) Complete jamb fastening and install hardware
8) Adjust sill and dollar bill test
9) Check or install corner seal pads
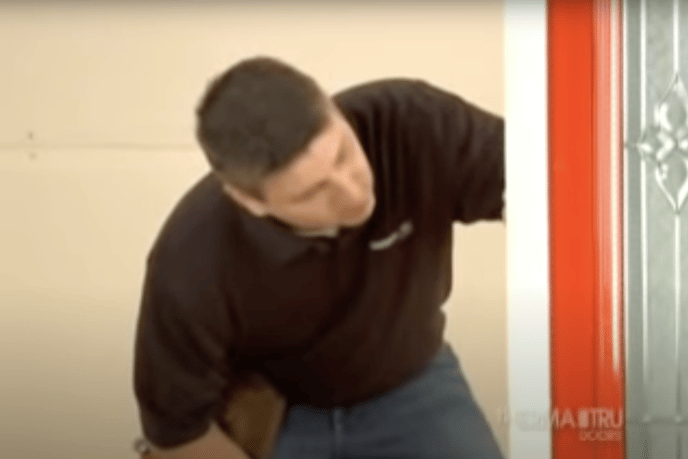
Step 1) Check door unit
First, measure the width & height of your unit to ensure it will fit within the open space.
Then using the pry bar and hammer, remove the exterior packaging and cleats from the door unit. Do not remove the shipping clamp that currently keeps the door closed.
Step 2) Prepare opening
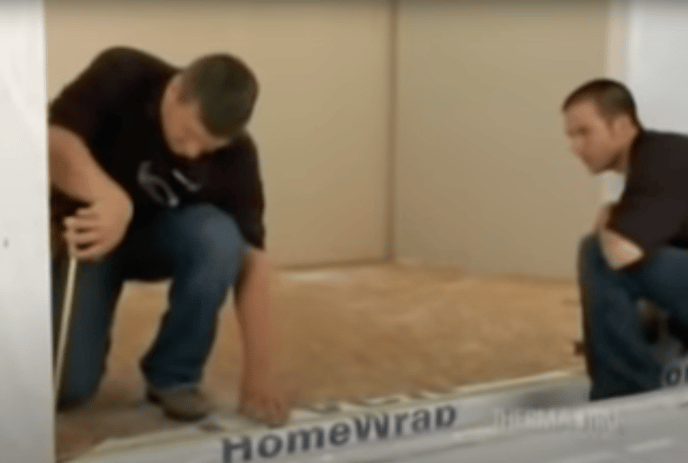
Using the 6ft level, ensure that the subfloor is level and solid.

If the subfloor is not level, then be sure to scrape, sand, or fill the subfloor to ensure a level starting point.
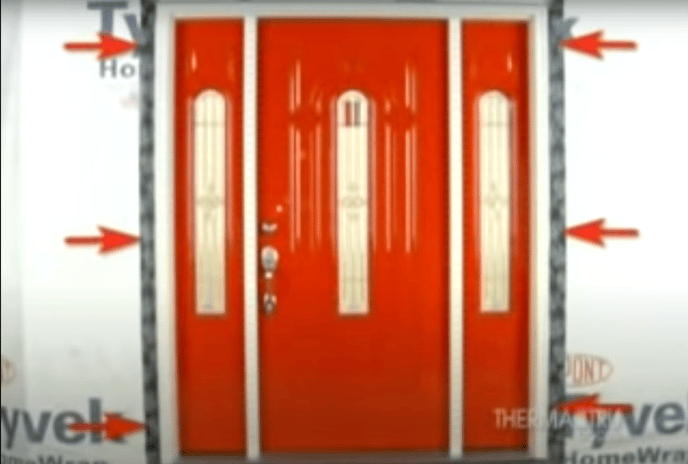
Now ensure that the opening is the correct size and will fit your door unit.

Acceptable sizing is unit height +1/2 inch, and unit width +1/2 or 3/4 inch.
Then check all corners with a framing square to ensure the opening is square. Double check diagonal measurements as well to be sure.

Next, make sure the framing is plumb using your level and the process detailed here.

Next ensure that the walls are in the same plane. This is done by running a string diagonally across both sets of corners of the opening. If the strings gently touch, then they are in the same plane.

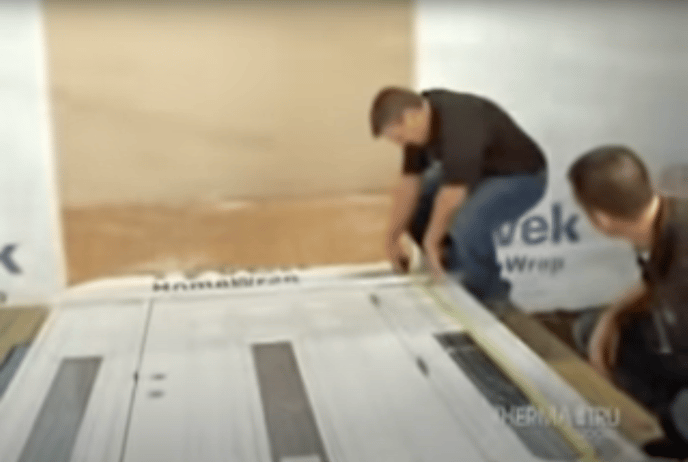
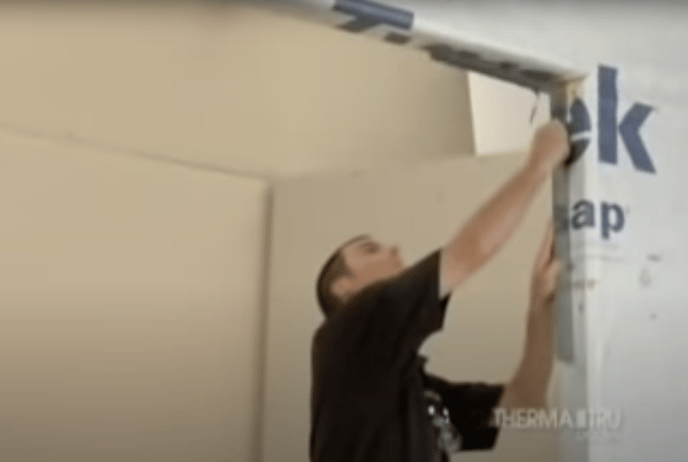
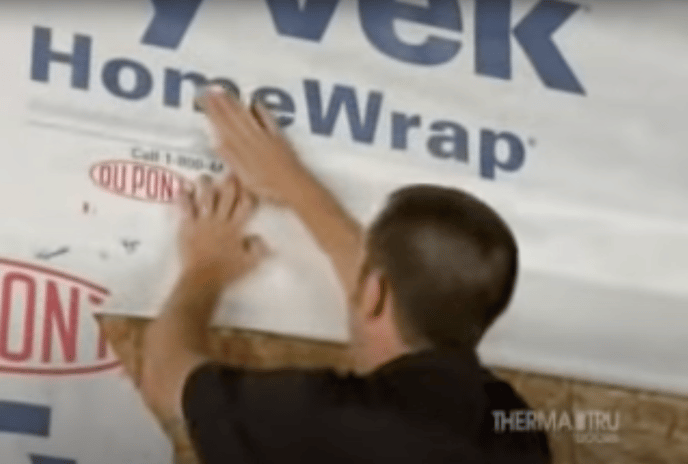
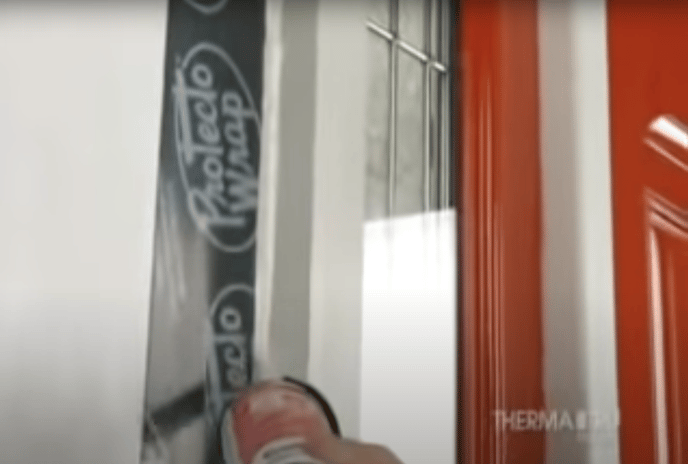
We recommend a weather resistant barrier and flexible flashing material be used during installation.
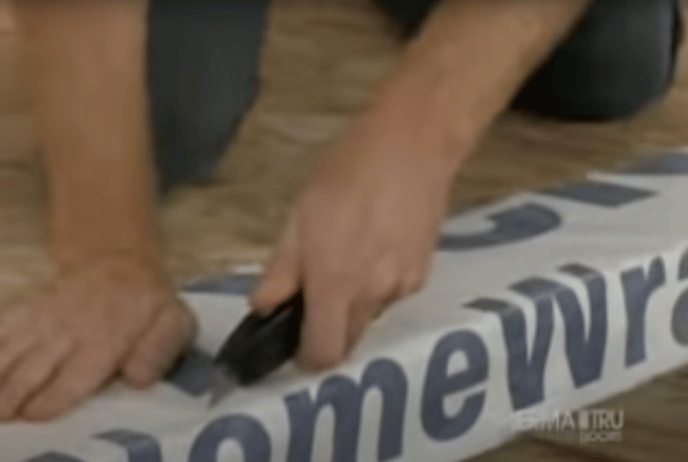
Cut the material out of the opening on the top and bottom (taping up the top out of the way).
Lastly, when installing flashing, always work from the bottom up and install it in an overlapping pattern as shown here.
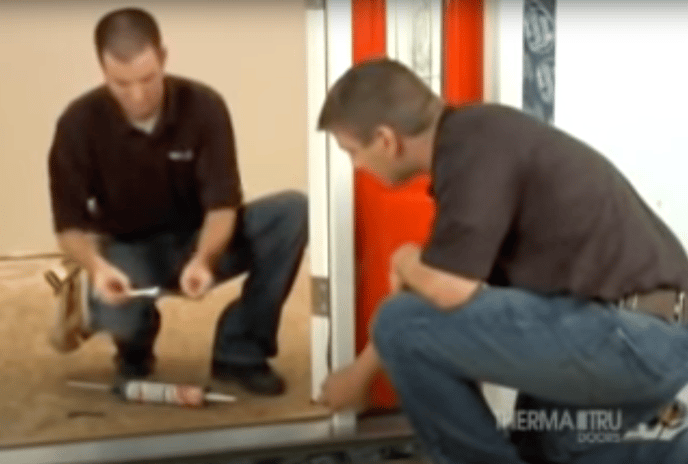
Step 3) Sill pan installation

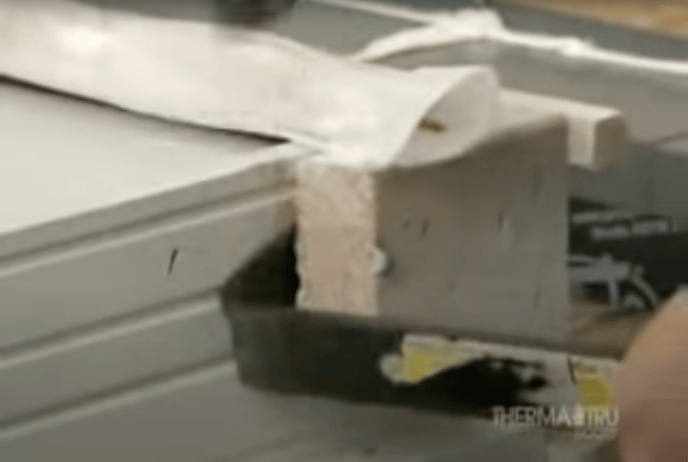
Before installing, dry fit the sill pan within the door way to ensure you have enough material. Measure the overlapping portion and mark it. This is needed to trim the material to the proper length.
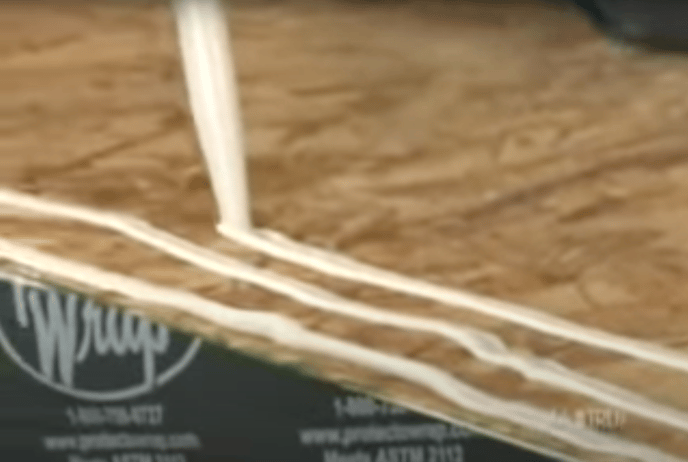
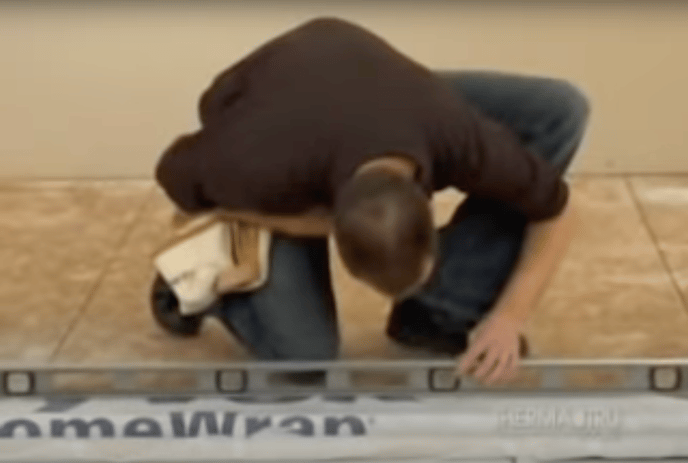
Begin installation of the sill pan by placing 3 beads of elastomeric or polyurethane caulk along the entire length of the door way.
Press the outer portions of the sill pan down firmly on to the caulk to ensure a good seal.
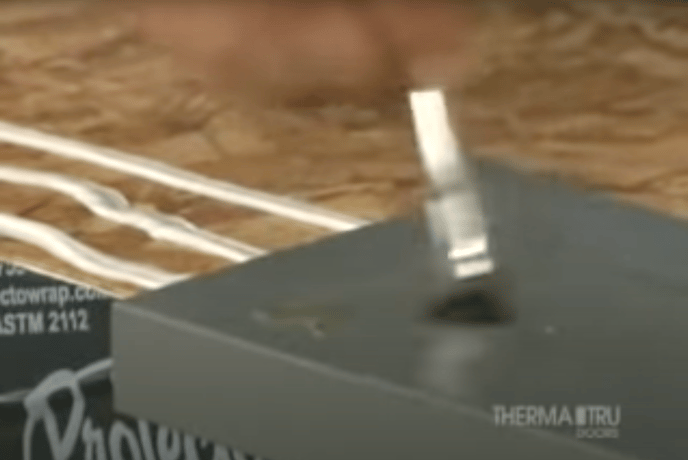
To bond the pieces together, use the included PVC cement on the overlapping portions of the sill pan. Hold the pieces together long enough to ensure a good bond.

Now is time to cut the sill pan down to the proper length with shears or tin snips. Remove any excess sill pan that is not necessary for bonding the center to the outer portions.

For added protection, spread a bit of caulk along the glue joints.
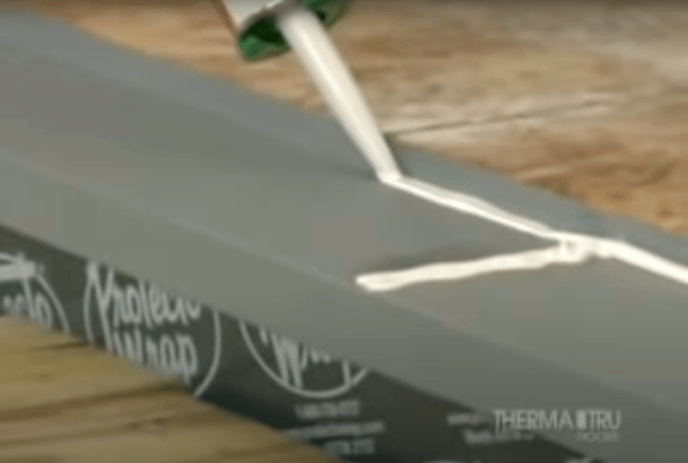
And lastly, to prevent any air leaking, add a long bead of caulk down the entire length of the sill pan lip.
NOTE: Do not caulk the bottom of the sill if you are using a sill pan.
NOTE 2: If installing without a sill pan, simply apply a full bottle of sealant to the sub floor, as well as large beads along the bottom of the door unit sill, and behind the brickmoulding around the outside edge of the door unit.
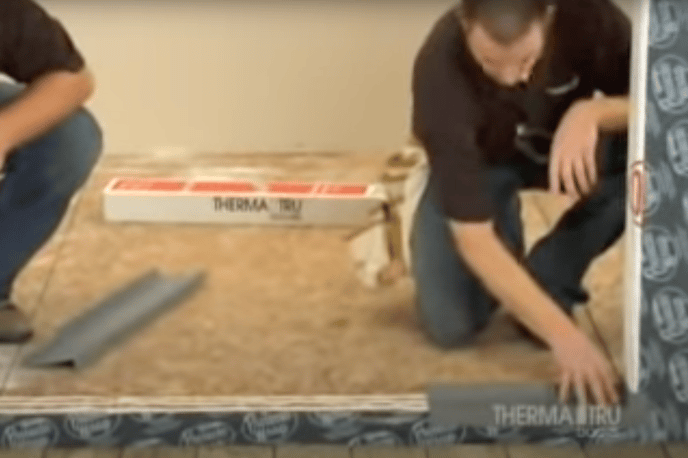
Step 4) Place unit in opening
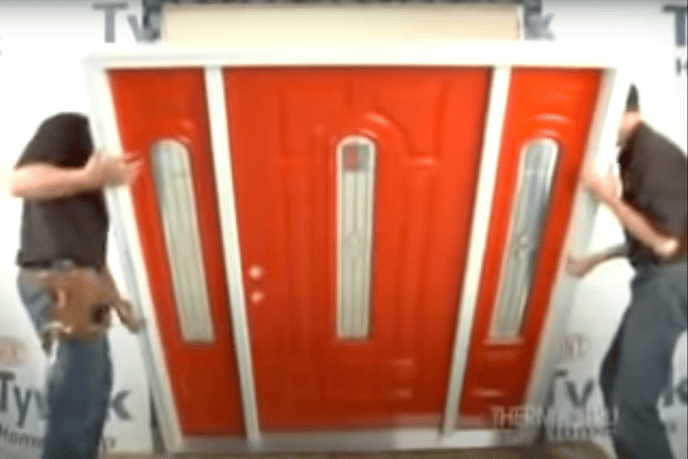
Place the door unit into the opening sill-first, then tilt the unit upward until it is standing upright within the opening.
Be sure to note hinge placement and mark the locations along the door jamb.
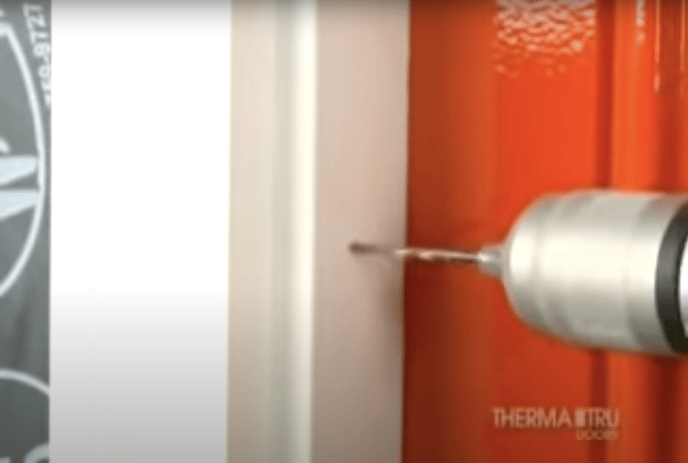
Pre-drill 1/8-inch diameter holes for screws.
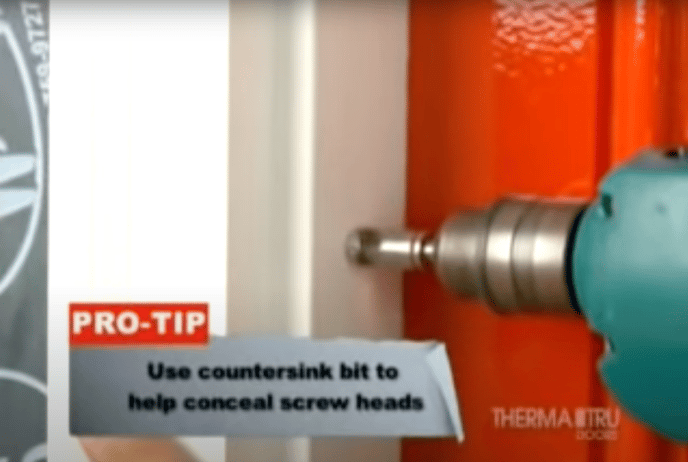
Use a countersink bit to conceal the screw heads.
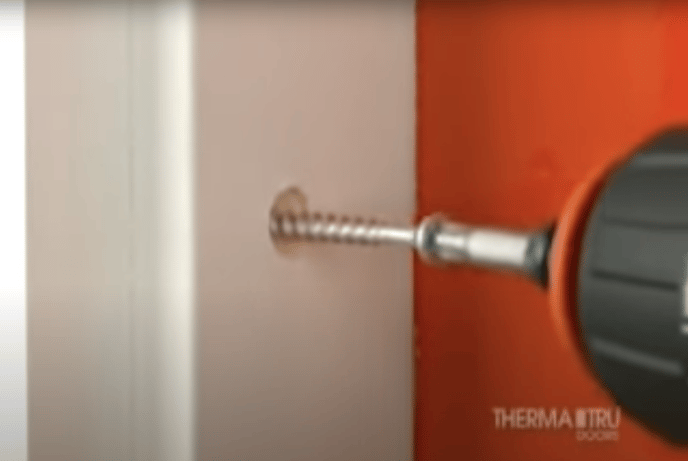
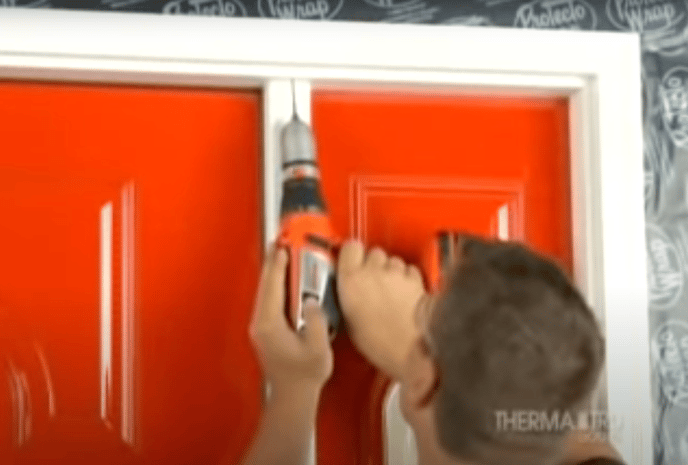
Now install screws in the center hole locations on both frames to temporarily secure the door unit. DO NOT fasten through the brickmould.
Next, plumb the hinge-side jamb both ways with a level. If securing a door by itself, then install the remaining screws through the door jab and into the stud on the hinge side.
If installing a unit with a sidelite, fasten the unit to the jamb on the hinge-side of the door, but do not fasten screws completely.
For double door installations, fasten the hinge side of the static or passive side of the unit first.

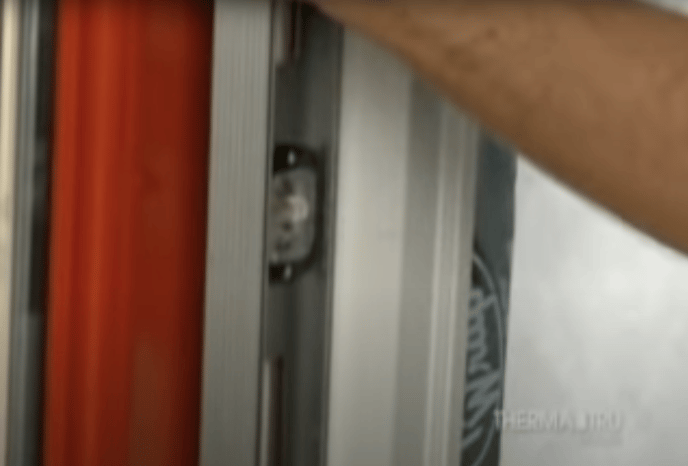
Next, place a screw at each hinge location so shims can be placed behind the hinges. Screws will prevent the shims from moving out of place during adjustments.
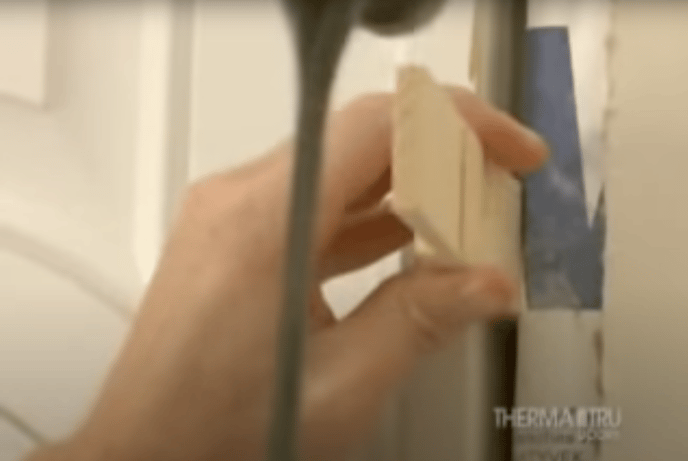
Step 5) Shim jamb at hinge locations
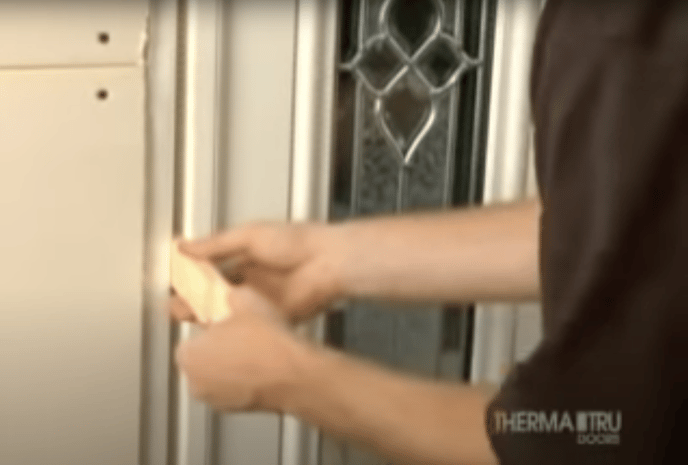
While the door is closed and secured by the temporary screws, place shims between the jamb and wall opening.
Once completed, ensure that the door unit is still plumb and straight using a 6ft level.
Then finish by tightening screws completely. Beginning with middle, then top, then bottom.
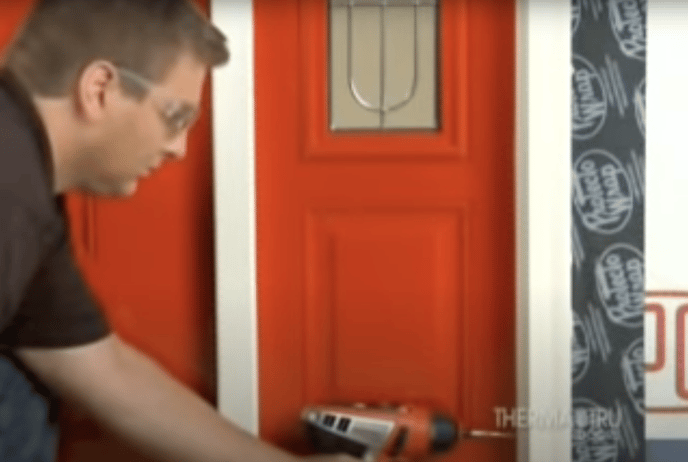
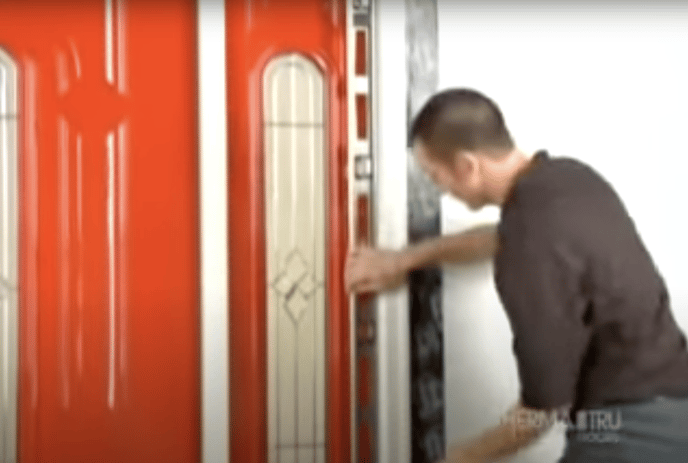
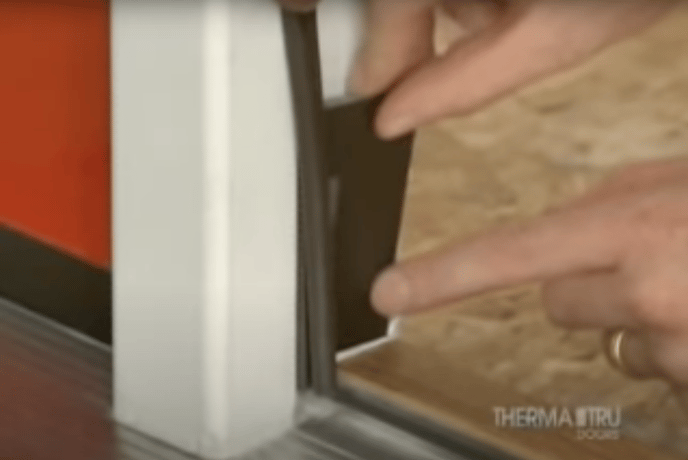
Step 6) Adjust and fasten lock-side frame
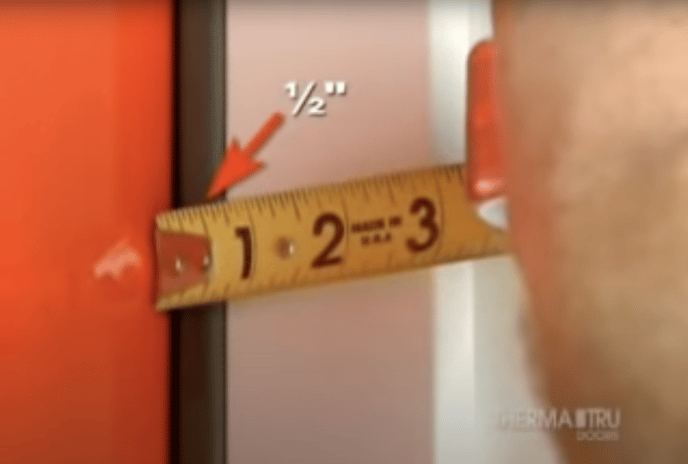
Begin by measuring the space between the door surface and the jamb where the weatherstrip resides. This should measure 1/2 to 3/8ths of an inch along the entire jamb. Secure the lock-side of the door by installing the jamb screws along the outside of the unit. Do not fasten the screws completely.
Begin placing shims behind the screws on the swing side of the door to ensure margins are even from top to bottom.
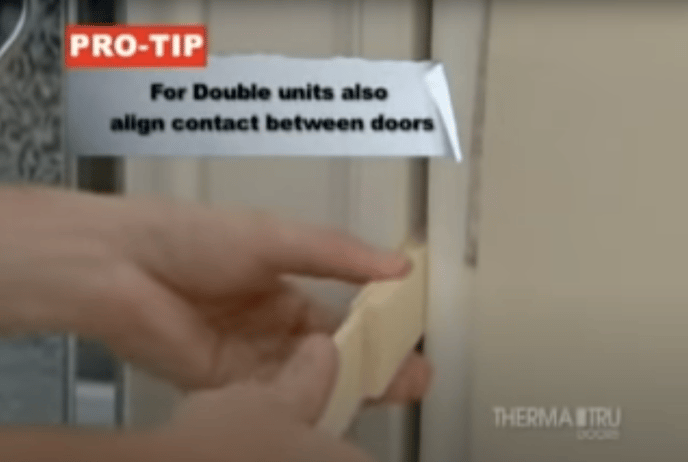
For double units, you will also need to shim to align contact between the two doors. Recheck everywhere for plumb and square before securing.
Finish driving screws tight at this point.
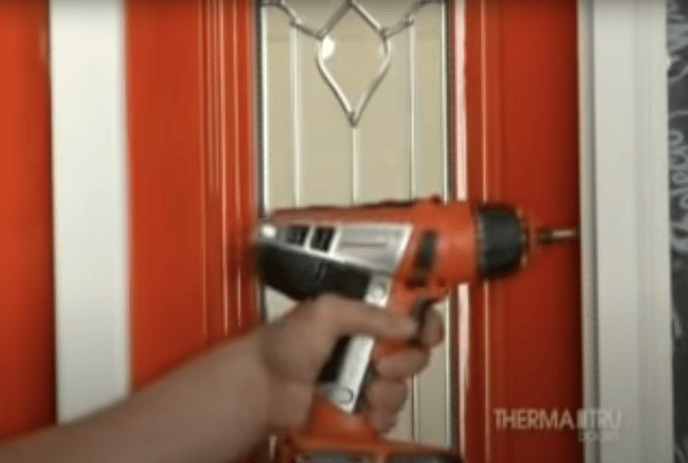
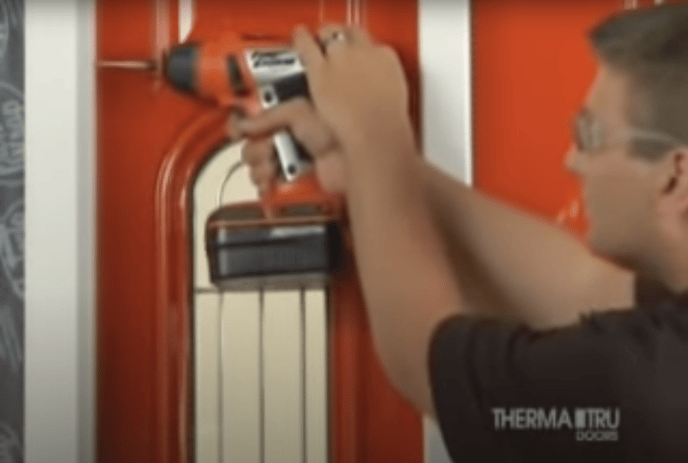
Step 7) Complete jamb fastening and install hardware

Now it's time to remove the shipping assembly the keeps the door closed. Simply unscrew the metal plate from the door and remove.
Next, open the door and ensure that the hinge screws have been pre-installed.
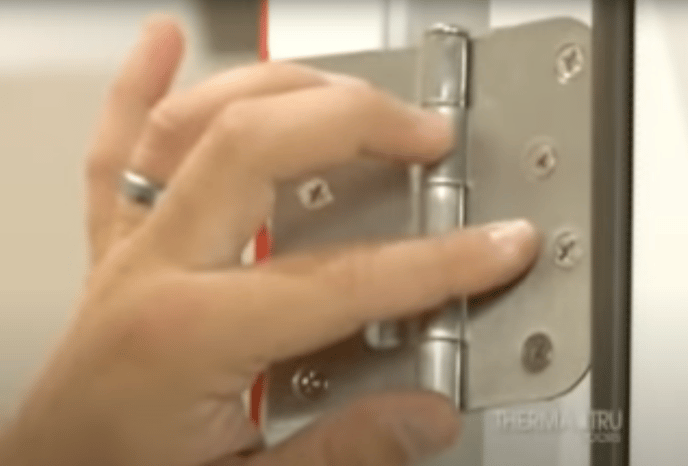
If the screws are missing, use #10 2.5 exterior grade screws to anchor the door to the jamb via the hinges.
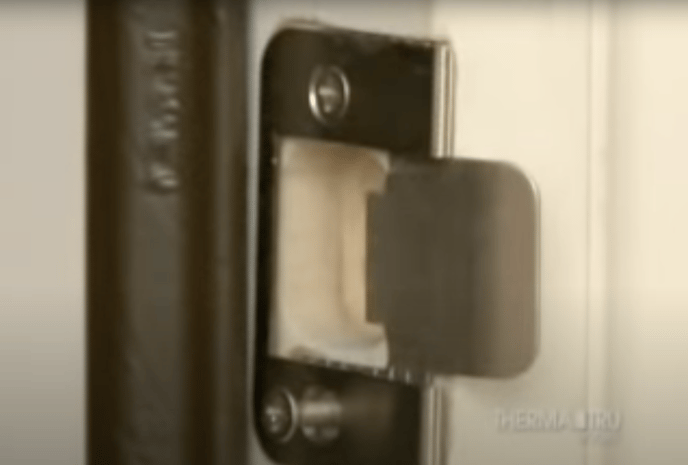
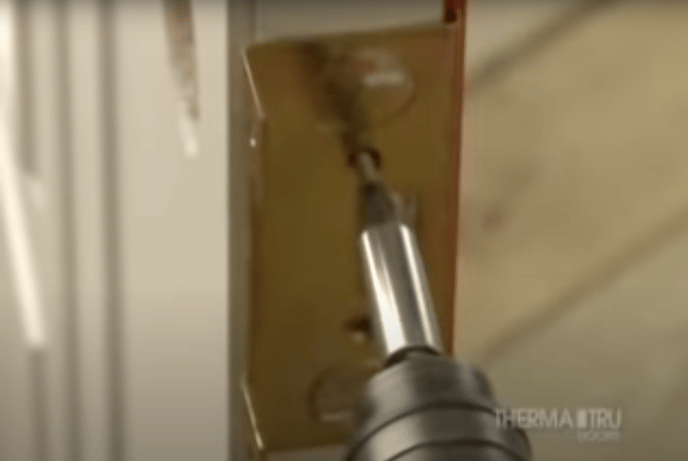
Now to install the adjustable strike plate. Locate the center hole of the jamb, and ensure in lines up with the lock location on the door. Drill two pilot holes, and then partially secure the strike plate with screws. Adjust it to the desired length and then secure completely.
Step 8) Adjust sill and dollar bill test
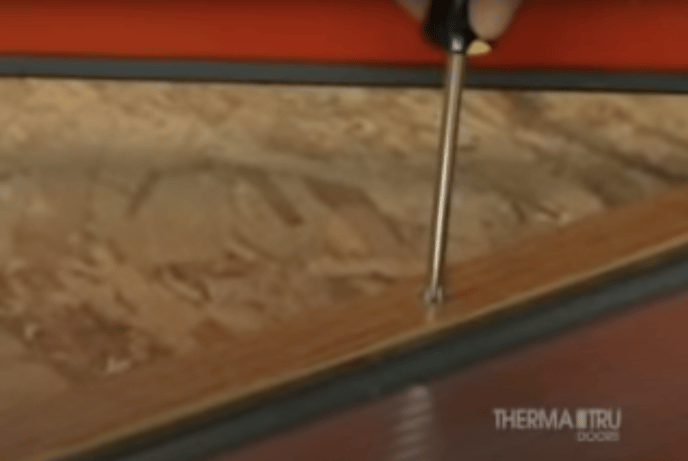
Your door unit's sill may be adjustable. If so, use a screw driver to adjust the height of the sill.

Proper fit should be snug. Such that you can barely pull a dollar bill out from between the door bottom and sill, without tearing.
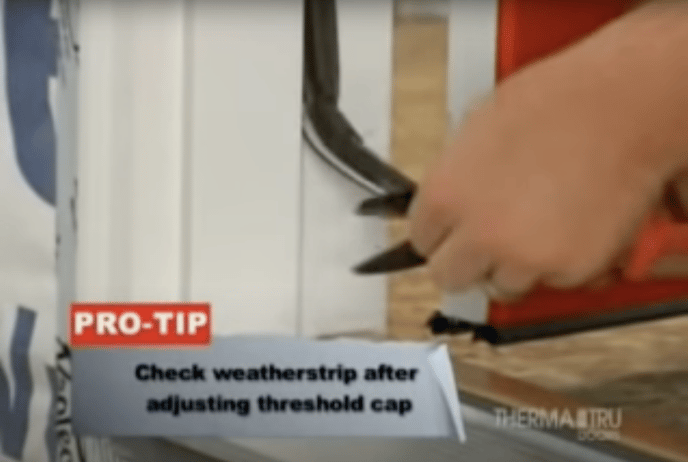
Lastly, make any needed cuts to the weatherstrip to ensure that it fits properly within the jamb now that the sill has been adjusted.
Step 9) Check or install corner seal pads

This step is specific to in-swing doors only. To secure corner pads, place a bead of sealant where the jamb meets the sill.
Next remove the sticky backing from the corner pad.
Now place the pad in alignment with the sill so the sealant holds the bottom in place. Proper installation shows the tab side facing upward and the narrow portion touching the sill.
Step 10) Additional anchoring and other configurations
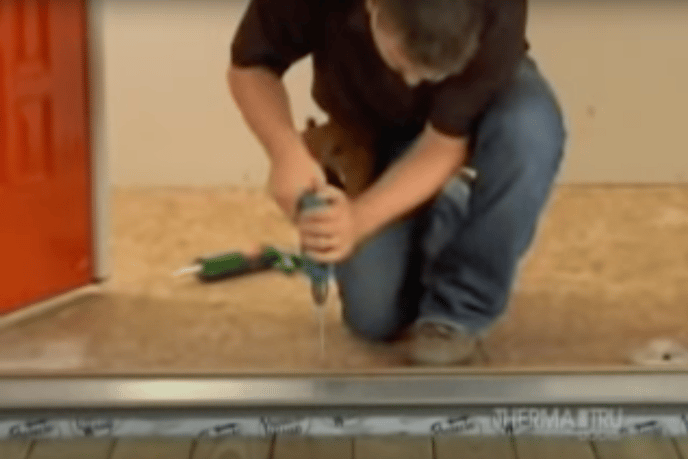
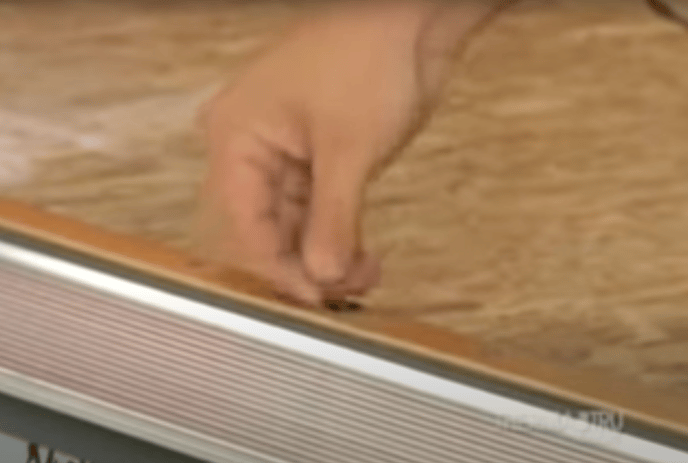
For additional door anchoring, place shims along the top of the door jamb between the jamb and opening.
Next drill pilot holes and secure the jamb further by installing more screws next to the shim locations. Now remove the shims. Special building codes may require you to reinforce your installation against hurricane-level winds. Be sure to consult your local building codes at this point.
For double doors, drill a hole into the threshold where the astragal slidebolt is located (when the door is closed).
Insert the astragal fill plug to properly house the slidebolt.
Next, surface-mount the keeper strike to the jamb.
Close the inactive door now to lock it into place and ensure weatherstrip spacing is correct (3/8-1/2 inch). Repeat the strike plate and hinge installation process above to complete the hardware install. Now repeat this shimming and measurement process on the active door to ensure that the jamb is properly secured.
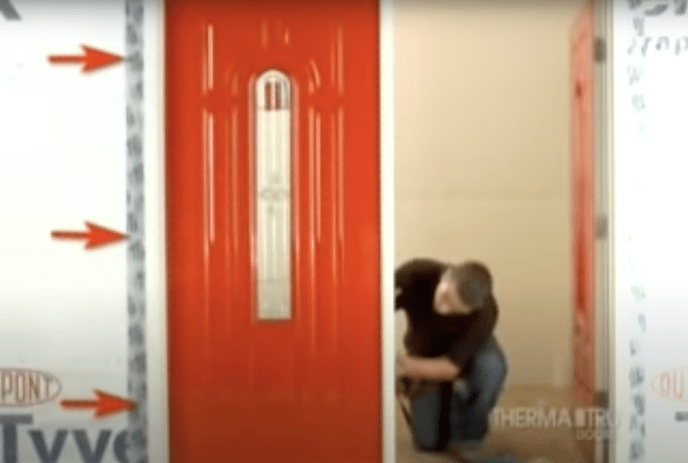
Step 11) Weatherproof, finish & maintain

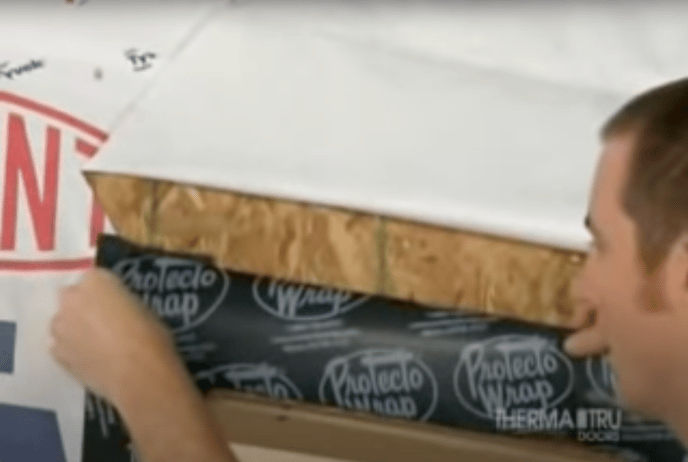
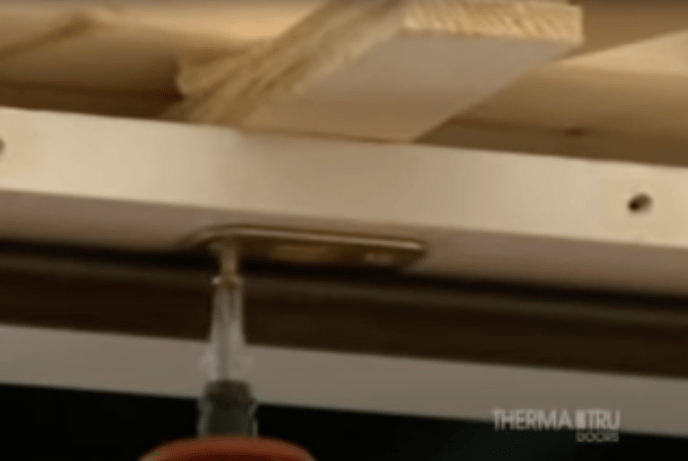
Weatherproof by installing a cap or head flashing beneath the weather-resistant barrier. Then tape down and seal the flap taped up at the beginning of the install.
Next, caulk along the head flashing and along the entirety of the exterior side of the door jamb outside of the brickmould. Be sure to seal all joints between jambs and mouldings. Also seal spaces between exterior hardware and trim to prevent water infiltration.
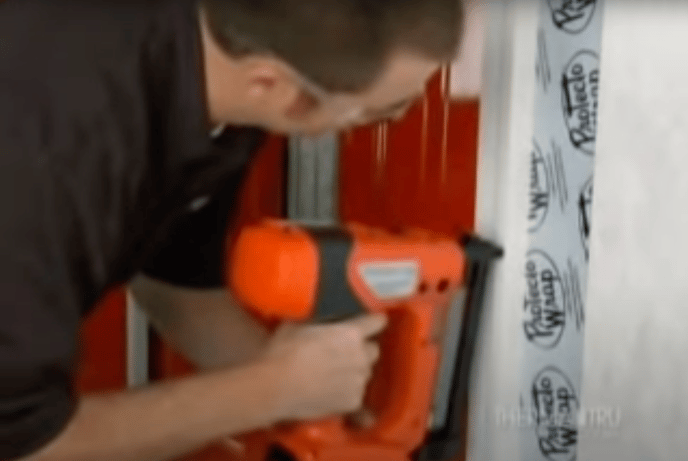
Next, install galvanized finish nails through the brickmould around the perimeter (or use exterior grade screws if you will be installing a storm door that attaches to brickmoulding).

Lastly, cover all fastener screw-holes with exterior grade putty.
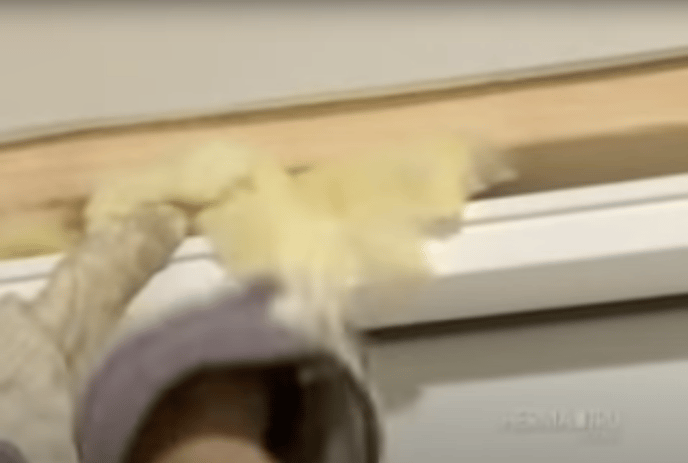
It's also recommended that you add insulation between the head jamb and door opening on the inside of the door unit as well to help further fortify the installation against weather. Your installation is now complete.
NOTE: Doors must be stained or painted according to Therma-Tru guidelines within 6 months of installation to be eligible for warranty. More information of the finishing process can be found here.