| Time Required: | Difficulty: |
Tools Required
- Retractable Screen
- Safety glasses

- Screw gun/power drill & 3/32nd inch drill bit

- #2 drill bit driver/ screwdriver

- Tape measure

- Caulk gun & caulk (we recommend OSI Quad MAX)

- Hacksaw (if door is less than 68" wide)

Materials Required
- Latch screen housing
- Latch-Hook screen housing
- 2 tracks
- Sill plate & extenders
- 4 1 & 1/4 inch housing screws
Steps to complete
2) Ensure your installation kit contains all of the needed materials
3) Door orientation & unpacking
Step 1) Door fitting & handedness
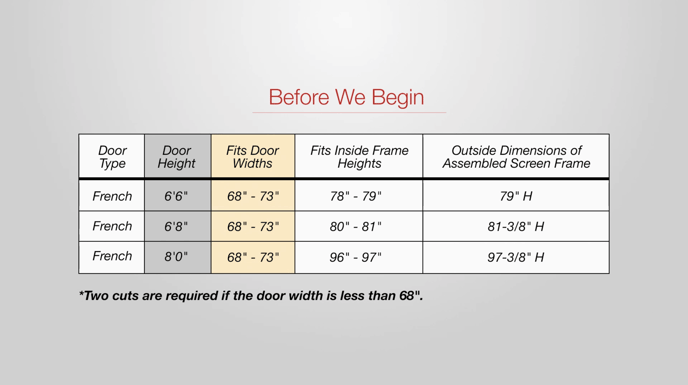

Before beginning the install process, you'll need to ensure that you have the right door to cover your opening. Use the table above for reference. This same table can be found in the instruction pamphlet included in your screen door packaging.
You'll also need to determine which door is active and which is passive. The door with the attached astragal is your passive door.
NOTE: Our retractable screen doors are not recommended for out-swing doors. Ensure that the doors you plan to install on are an in-swing assembly only.
Step 2) Ensure your installation kit contains all of the needed materials
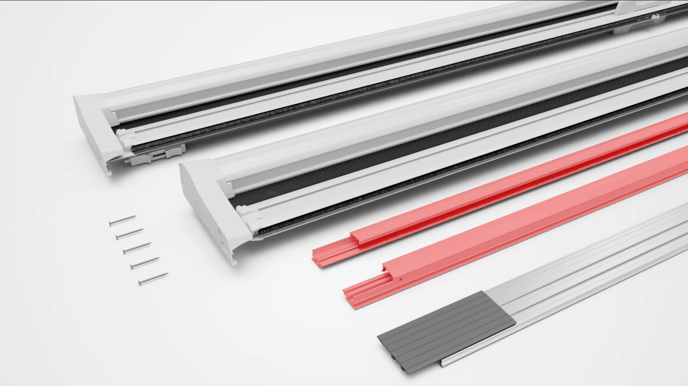
Next, ensure that your retractable screen door kit contains all of the materials listed:
- Latch screen housing
- Latch-Hook screen housing
- 2 tracks
- Sill plate & extenders
- 4 1 & 1/4 inch housing screws
Step 3) Door orientation & unpacking
Remove the door components from the packaging, leaving only the foam blocks pictured here in place in the corners of the door assembly.
Step 4) Frame assembly & modification (if applicable)
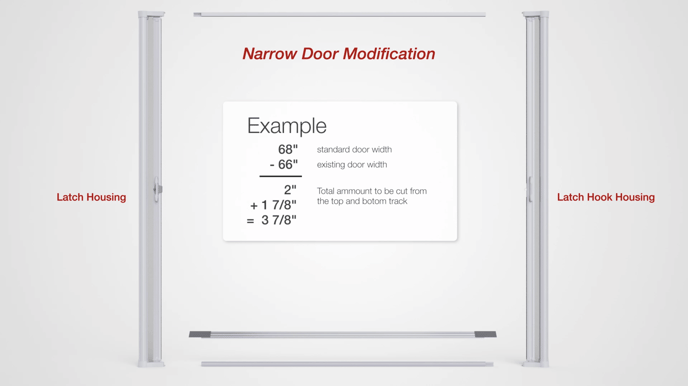
Before assembling, measure your door opening. If it is smaller than the kit's default 68 inches wide, you may need to cut down the tracks with the hacksaw mentioned above. Use the graphic above to determine measurements and any needed cuts.
Step 5) Door installation
Once the track is the proper length, you can begin the assembly process by orienting the door so that the latch-side retracting mechanism aligns with the hinge-side of your passive door, and inserting the non-cut (if applicable) end of the track into the corner of the screen housing. Move the foam block up that is blocking its path, but be sure to leave the block separating the screen and housing in place to prevent the screen from recoiling (shown above). Make sure that the end caps thread through the tracks and snap into place. Repeat this process on the opposite side.

If the tracks needed to be modified for a smaller door opening, then ensure that the uncut ends are inserted into the latch-hook side housing.
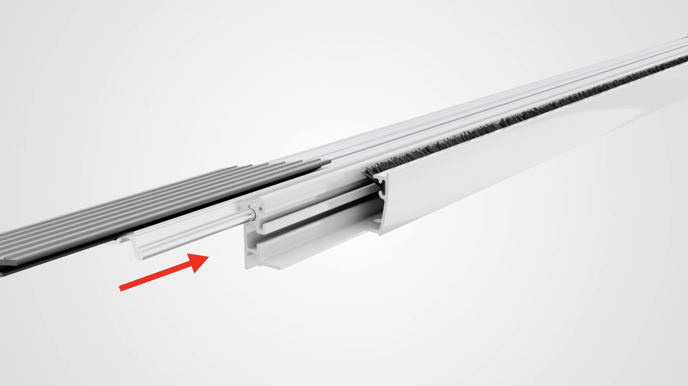
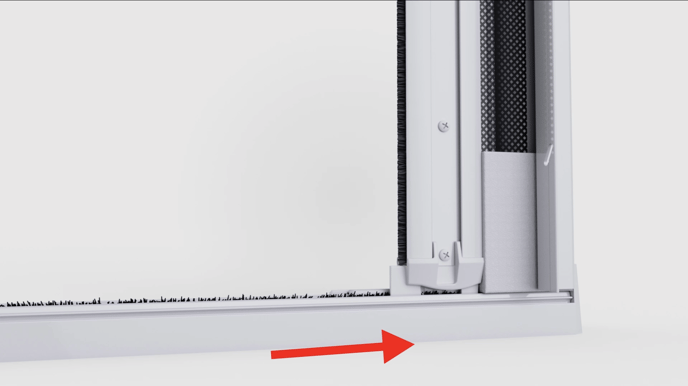
Next, slide the sill plate assembly into the bottom track. Do not deploy the screen until is secured to the doorway.
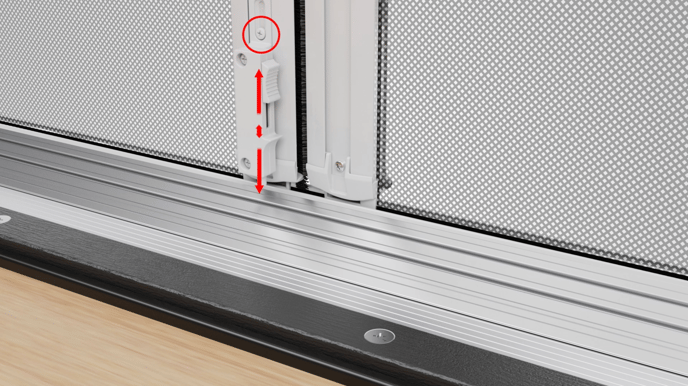
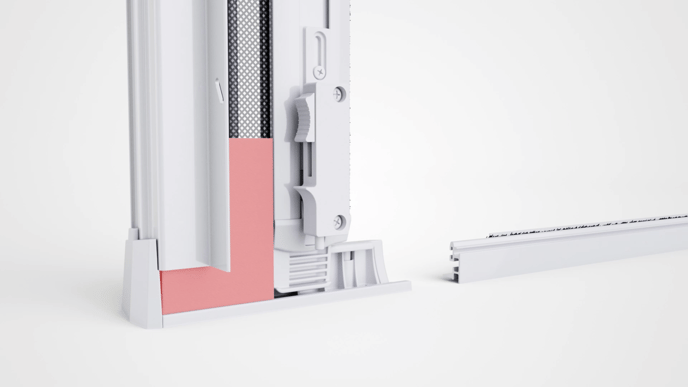
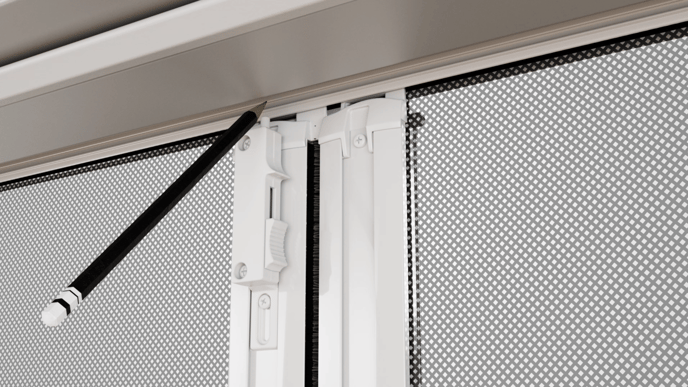
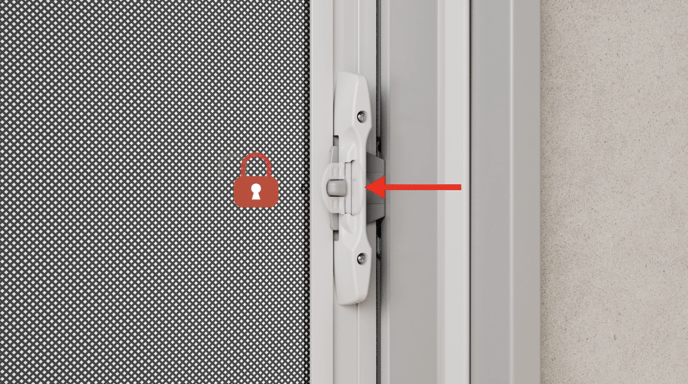
If needed, height adjustments to the slide bolt can be made now by loosening the screw shown above. Further adjustments will be made later.
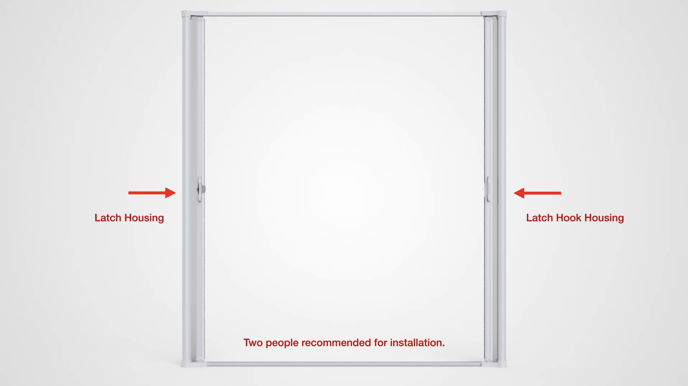
To begin installation, press the latch screen housing and latch-hook screen housing sides together so that the assembly is at its narrowest point. Then, place the assembly onto the door sill. Extend the assembly out until both phalanges are snug with the brickmould or exterior trim.
NOTE: This step will require the help of another person to complete.


Next, mark and drill 4 holes (one in each corner) in the screen housing. Then, from the top-down, insert the screws into the pre-drilled holes in the phalanges to secure the assembly in place.
NOTE: Be sure not to over-tighten the screws in this step.
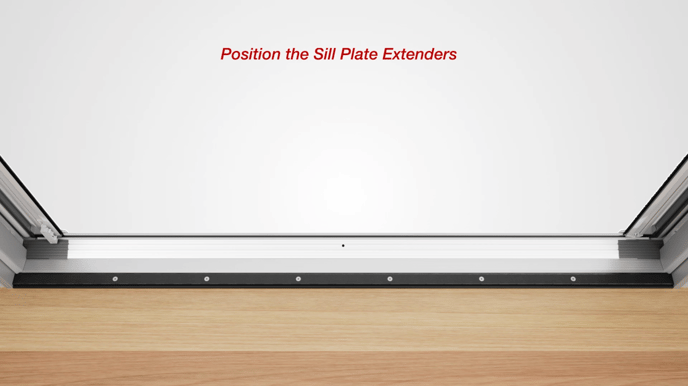
Next, center the sill-plate assembly on to the door sill. Then slide the sill-plate extenders to each side to fill in any gaps.
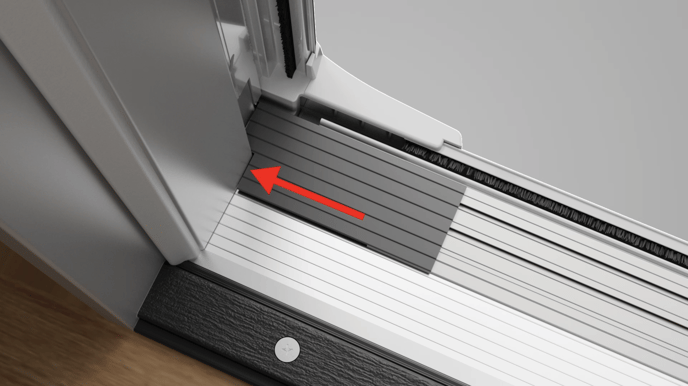
For a tailored look, use scissors to cut the sill-plate extender to the fit the profile of the door frame as pictured here.

Now, deploy the latch-hook side slider until it reaches the middle of the door opening.
Mark the position of the slide bolts on the upper trim and bottom sill plate of the door assembly.
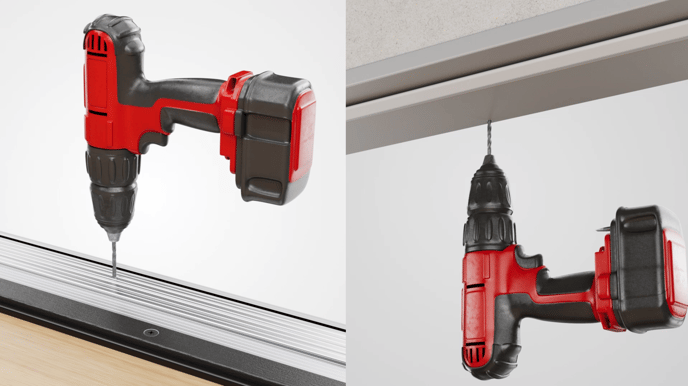
Retract the slider and then drill two 1/4 inch holes in the sill plate and upper trim to secure the slide bolts. Deploy the slider and ensure that the bolts fit properly into the new holes.
NOTE: Do not drill into the house sill.
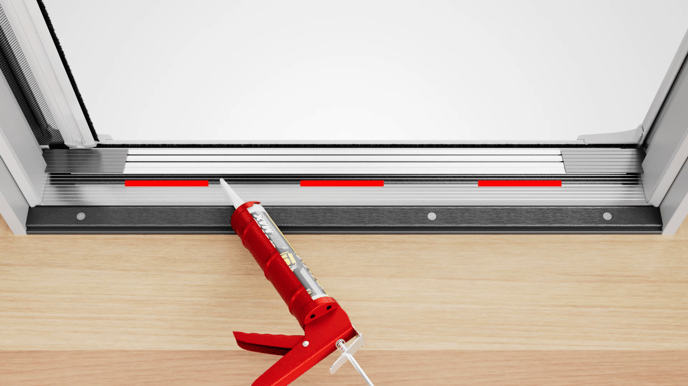
Lift the sill and place 3 10-inch beads of caulk in the pattern shown above. Be sure to not get any caulk on the sill-plate extenders, and then press firmly down to ensure that the sill adheres. Wipe away any visible excess caulk.
Step 6) Ensure latch alignment & locking
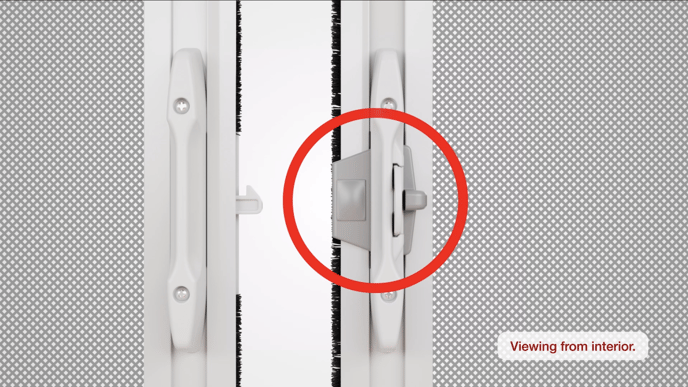
Deploy the latch-hook side slider until it is secured by the slide bolts. Then deploy the latch-side slider until it meets the hook in the center of the door frame. Make sure the latch and latch-hook are properly aligned.
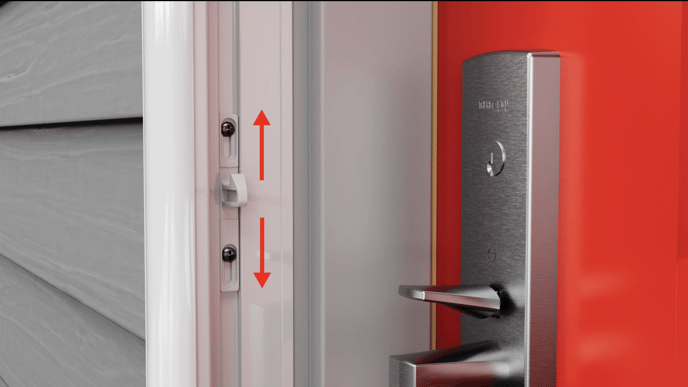
The latch hook can be flipped or adjusted up and down as needed by removing the set screws shown above.
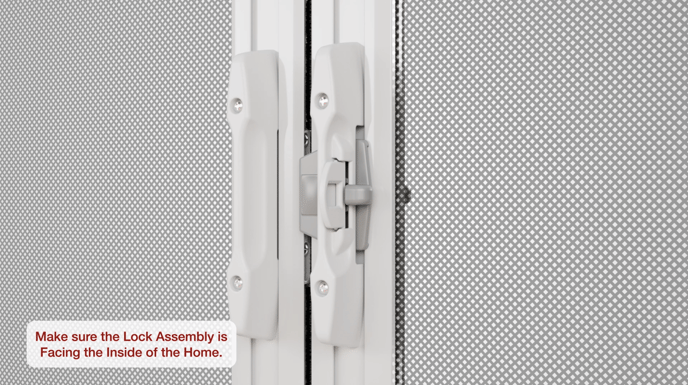
Ensure that the lock-side of the latch is facing toward the interior of the home.
On the interior handle, you'll find a handle lock. This piece pivots left and right to lock and unlock your screen door. When the screen is secured and locked, the screen cannot be opened from the outside. Your installation is now complete.