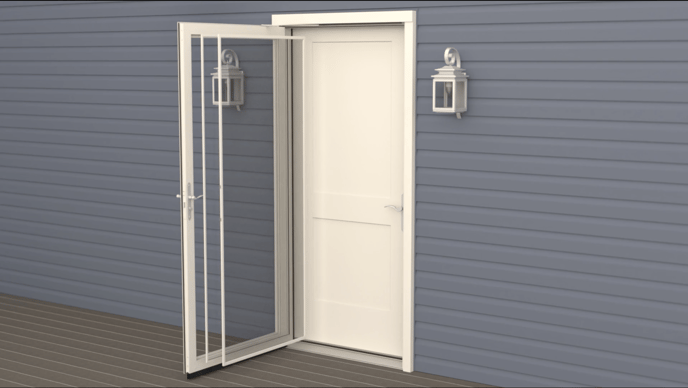
Tools Required
- Safety glasses

- Screw gun/power drill & #2 drill bit driver

- Flat-head & Phillips-head screwdrivers

- Step ladder

Step 1) Hinge Prep
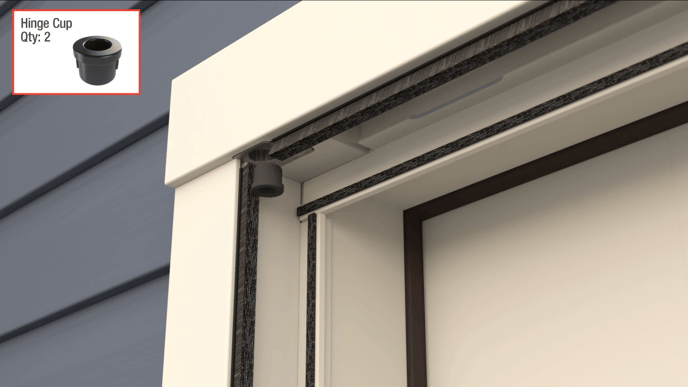
 Start by inserting a hinge cup in both the top and bottom bracket on the hinge side of your door.
NOTE: These must be inserted for the storm door to fit within the opening.
Step 2) Install hinge pins
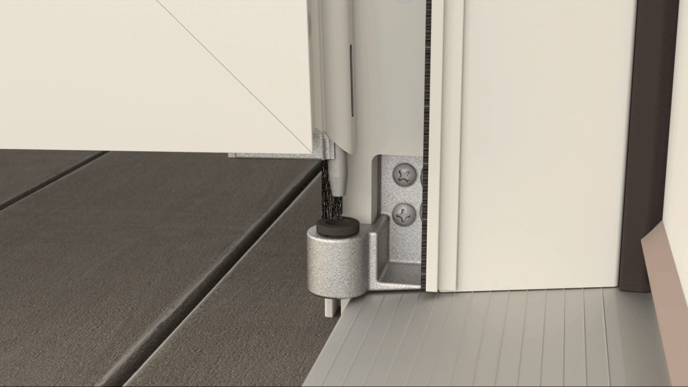
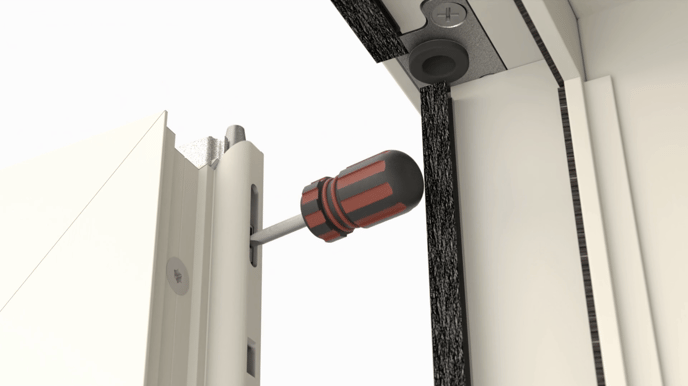 Next, insert the storm door's bottom pin hinge into the lower hinge cup. Use a flathead screwdriver to pull the top pin hinge down through the slot in the door while tilting the storm door into the. Remove the screwdriver. At this point, the top pin hinge should extend fully in place.
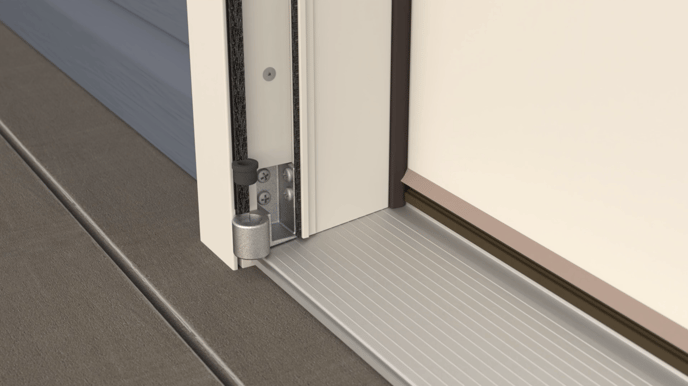
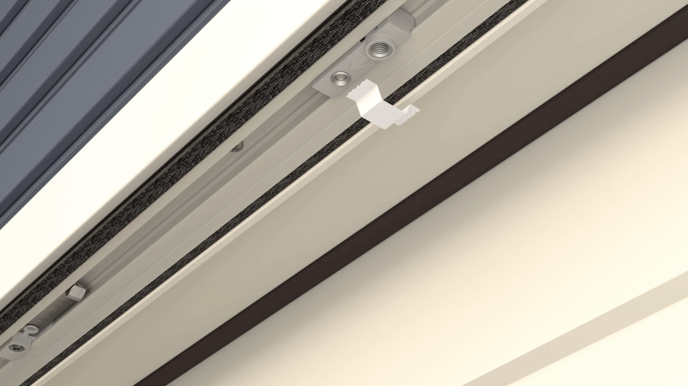 Now remove packaging from the movable slider pad on the brick mold.
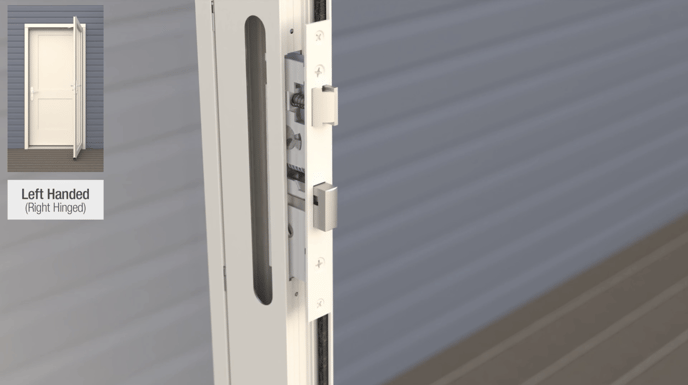
Step 3) Install strike plate
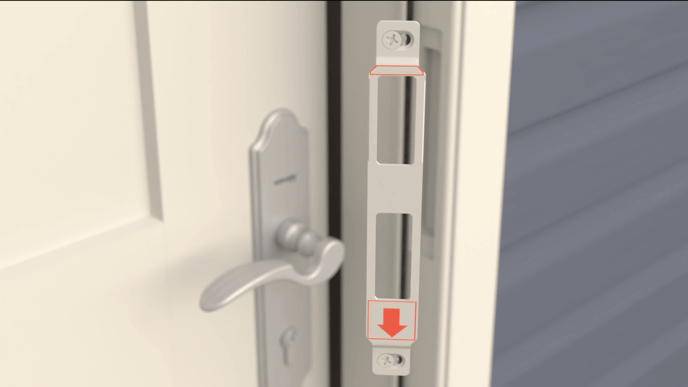
 Place the strike plate into the recessed area located on the latch side brick mold. Note that the strike plate is not symmetrical, and the larger flat area of the strike plate should be toward the bottom when you place it into the recessed area. Make sure it's flush with the brick mold and secure with screws.
NOTE: Do this carefully so as not to over-tighten or strip out the brick mold material.
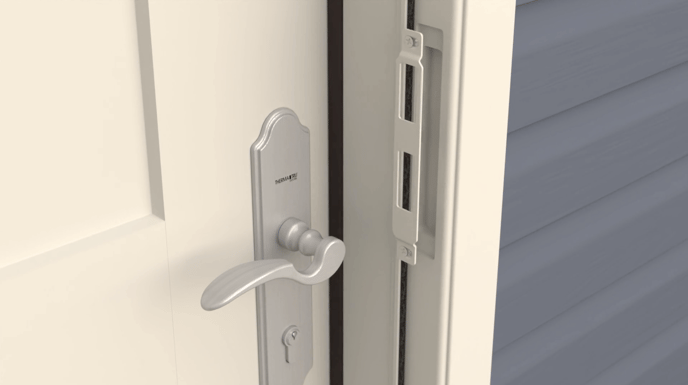
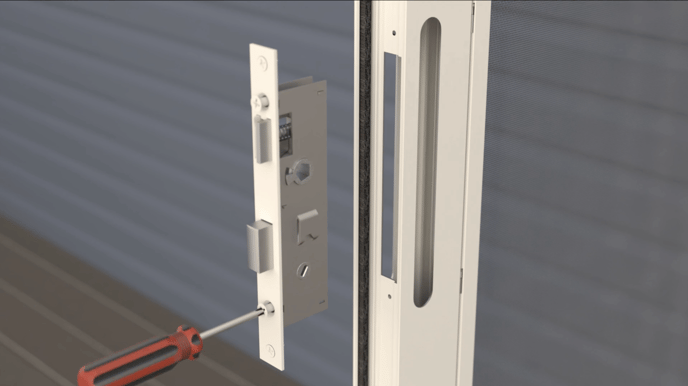
Step 4) Install lock-body
 Now locate the lock body. For left-handed doors, tighten the top and bottom screws to securely fastened to the door. For right-handed doors, loosen the screws on the lock body face plate.
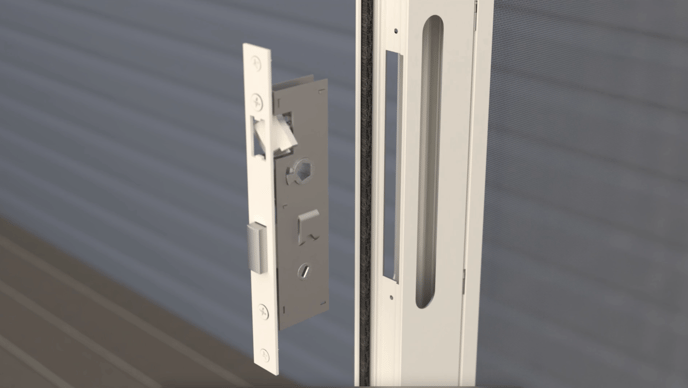 Push the latch bolt in behind the lock body faceplate and rotate to face the direction shown.
 Tighten the screws, then insert the lock body into the lock slot. Align the top and bottom screws with a pre-drilled holes, and fasten the lock body to the edge of the door.
Step 5) Install Quick-Fit locking handle
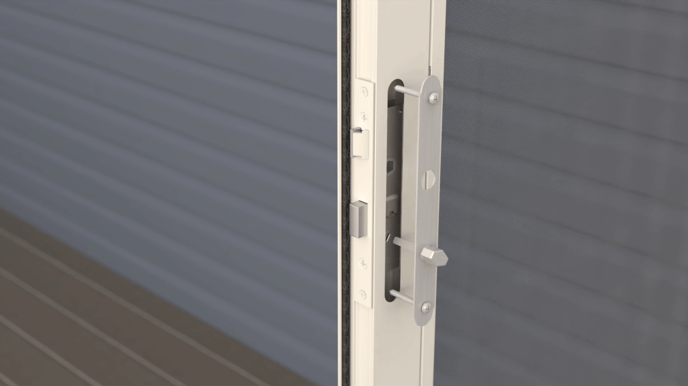
Now we'll position the interior quick-fit face plate. Open the quick-fit handle kit. Then insert the deadbolt spindle through the lock body, and insert the face plate screws through the interior side of the door.
 Align the funnels on the exterior face plate with the screws, and insert the deadbolt spindle into the key cylinder.
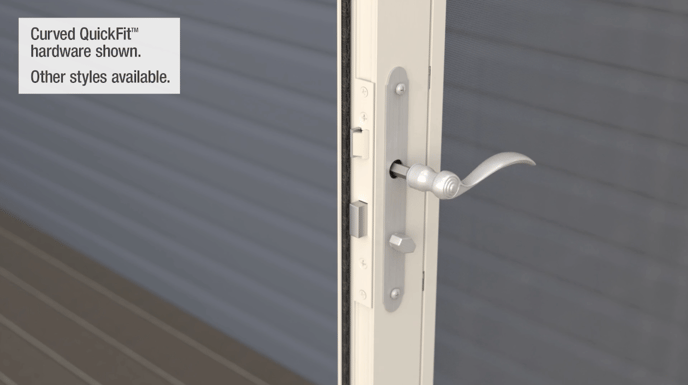
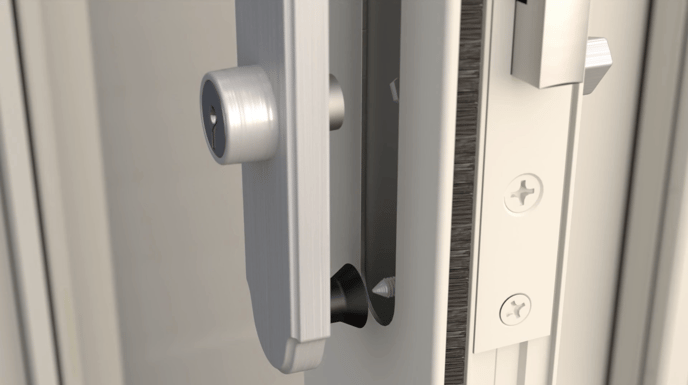
 Tighten the screws just slightly with your fingers. Now insert the handle spindle through the lock body and into the opposite handle.
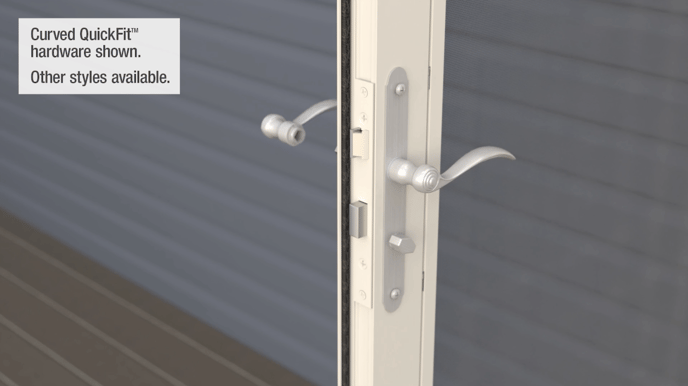
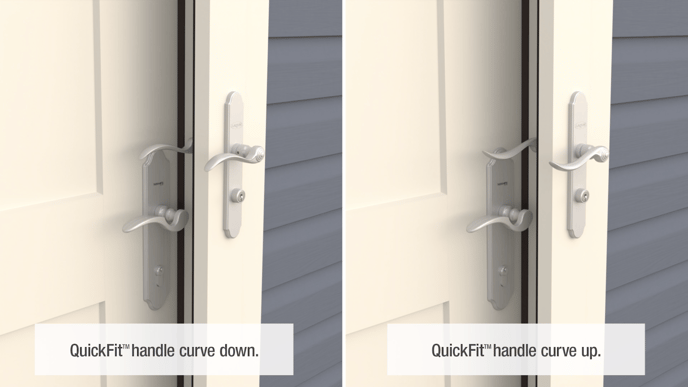 If you have a curved design, the handle curve may go up or down based on personal preference. You can insert the handle spindle from the interior to reverse direction of the curve.
 Then push the handles together, and tighten the set screw with the Allen wrench provided. Then tighten interior face plate screws.
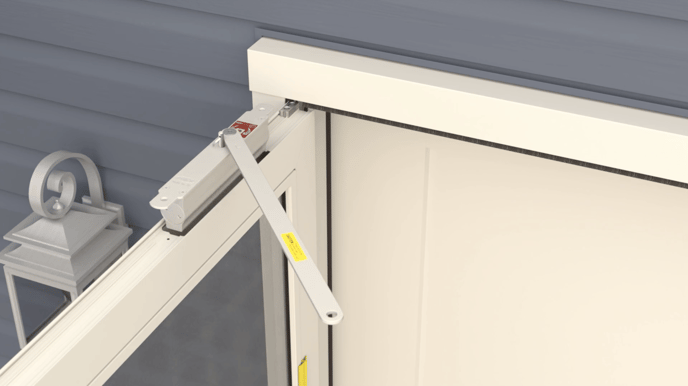
Step 6) Install hidden closer arm
 Next we'll attach the hidden closer arm. For a left-handed door, the hinges are on the right side, so the 'R' designator on the closer arm must be visible when installed. For a right-handed door, the hinge is on the left side, so the 'L' designator on the closer arm must be visible when installed.
 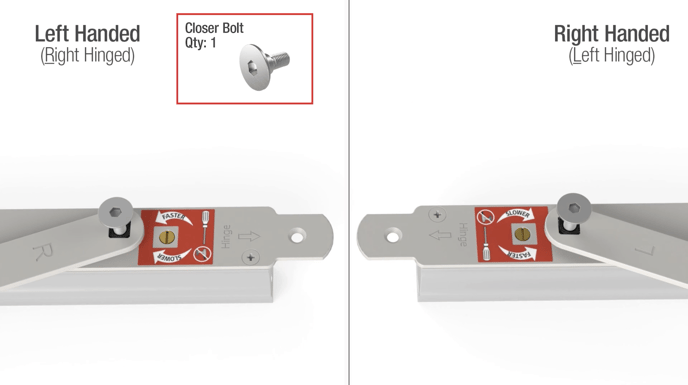 Attach the hidden closer arm, then insert the closer bolt, and tighten with the Allen wrench.
 Open the closer arm 90 degrees, and hold it in place while you insert the installation pin into the hole on the closer. You'll notice, the closer arm has some tension and will try to return to the original position when released.
 Now install the closer into the top pocket of the door. Secure it with two screws that came in the hidden closer kit.
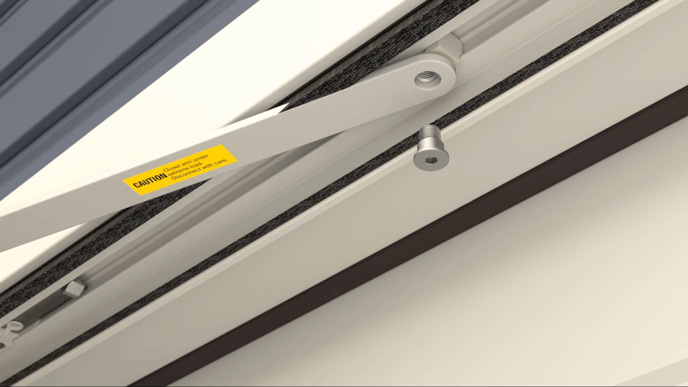 Close the door slowly to align the holes of the closer arm in the holes of the slider pad with each other. Use the Allen wrench to install the slider bolt. Make sure you do not over-tighten as this can cause binding.
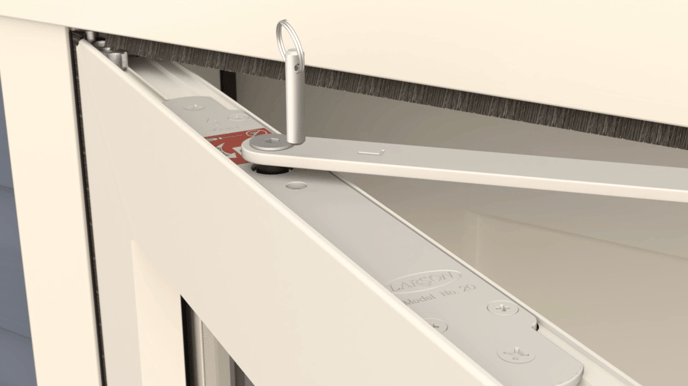 Now open the door slightly and remove the installation pin. Open the door all the way until the hold open clip engages with a slider pad.
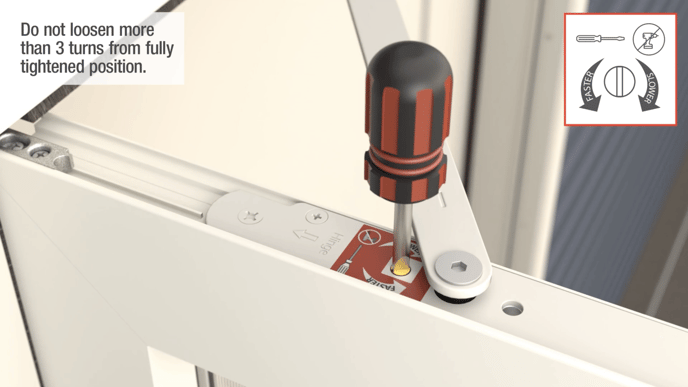 You can adjust the speed at which the door closes by using a flathead screwdriver. Turn the screw one eighth of a rotation at a time. Go clockwise for a slower close or counter-clockwise for a faster close. Check the speed of the close after each one eighth increment.
NOTE: Do not loosen the screw more than three turns from the fully tightened position.
Step 7) Install door expander
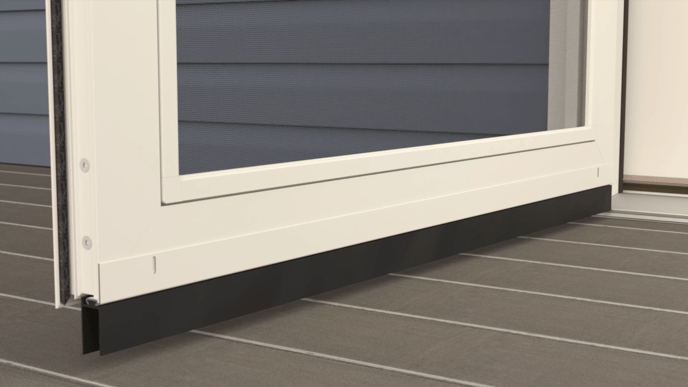 Now center the storm door expander on the bottom, inside of the storm door. Make sure this sweep lightly contacts the threshold when the door is closed. Secure it with two screws into the center of each expander hole.
Step 8) Install insert(s)
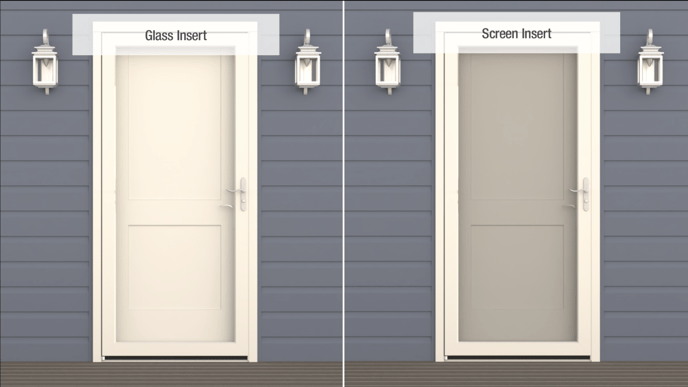 Your Impressions storm and entry door system comes with a screen insert and a glass insert. Choose the one you wish to install at this time.
 Remove the four yellow clips on the insert. Do this carefully because once the clips are removed, the screen or glass insert can fall out.
 To install the screen insert, stand on the interior side of the storm door, and make sure the screen clips are facing outward. If needed, gently expand the center of the screen to align the screen clips with the door channel.
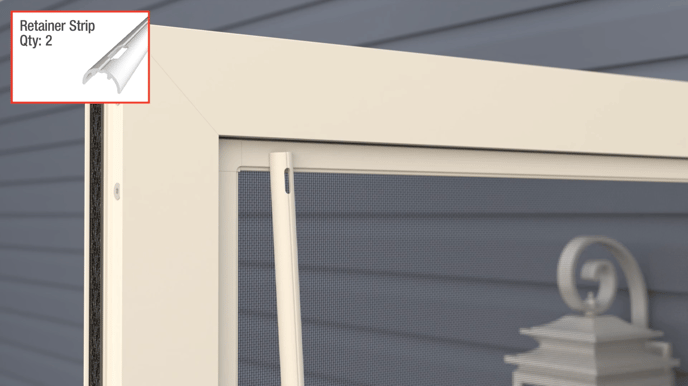 Locate the two retainer strips and insert one side starting at the top and working down, applying pressure along the way until it snaps securely into place. Repeat on the opposite side.
Your storm door is now installed on the unit and your Impressions integrated storm and entry door system is ready for use.